


14 October
Tips And Tricks To Using Eyeshadow

..
..Beautiful eyes can arrest the attention of the onlooker, and so it makes perfect sense to play up the beauty of your eyes with some makeup. In terms of eye make up, the most important role is played by the eyeshadow and if you want your eyes to work the magic you will surely benefit from the tips and tricks that we have enlisted here.
1. Blending is the secret: you’ll mostly need about two or three different shades of eyeshadow to create a dramatic effect, but unless you make all these shades blend smoothly and harmoniously into the each other you may not be able to achieve the desired effect.
2. Choosing the shades: there are just two ways to decide on what eyeshadow color will suit you best, and these are either you have to match the eye shadow’s shade with the natural color of your eyes or go in for some contrasting shade. You may have to experiment, a little, to find out what shades highlight the natural beauty of your eyes in the best possible way.
3. Don’t over extend the territory: some women extend their eyeshadow right on to the brow bone, but that’s not how you’re suppose to use eyeshadow, you need to end your eyeshadow a little before you reach the brow bone.
..
..4. Highlighting the crease: it’s important to blend the highlighter around the outer edge of the crease, to make your eyes appear larger and more beautiful.
5. Primer is a must: before you proceed with applying the eyeshadow, it’s always better to use a primer because a primer makes your eyelids look smoother while at the same time it will make your eye makeup to last longer.
6. Be careful with the shimmer: use shimmer in moderation, because any excess of it may make the fine lines and wrinkles around the eyes become more prominent.
Eyeshadow - Eye Makeup
..
..Which Blush Type Should You Choose?

While your skin type does count in making a choice, about the blusher type that will suit you best, you also need to look at how easy it is to apply the particular type and whether it is easier to blend, to get to the right effect.
There are four different types of blushers, and we have detailed them out here so that it becomes easier for you to pick and choose the perfect type.
Powder Blush
This is the most commonly available type, and nearly every well known makeup brand manufactures this type. This is long lasting and fairly easy to apply, and that’s what makes it the most popular. The best way to apply powder blush is using a makeup brush, as with the makeup brush it becomes easy to spread it evenly on your cheeks and to blend it well with your natural skin.
Gel Blush
This one isn’t as easy to apply, as the one we just talked about, but it is still popular because of the lovely translucent shine that it gives to your cheeks. This is best for you when your skin is somewhere between normal to oily. For this you don’t really need a makeup brush, as it can be easily applied using just your fingertips. It dries up quickly and is much more long lasting than the powder version.
Cream Blush
This is a little thicker than all the other blusher types, and as the name is indicative it comes with a cream base. And obviously, with its cream base, it is ideal for dry skin as it contains a lot of moisturizing ingredients. The creamy texture allows your skin to absorb the blush easily, while at the same time it makes it easier to spread it and to blend it.
Tint Blush
These aren’t very popular, but they’re definitely the best choice when you want to proceed with applying blush without using the foundation as a base. Even in terms of touch-up it’s much more convenient, than all the other types, however you don’t really need to touch it up so often because one application can easily last you all through the day. But you need to be very careful while applying it, because it dries up very fast, and thus blending it can turn out to be a bit tricky.
Buy Blush at reasonable Price
How To Plump Up Your Lips

Makeup and Lip Products
As we grow up we tend to lose the plumpness of the lips so that by the time we are in our fifties our lips start thinning out.
This can be prevented by the use of a proper lip balm when we go out in the sun. Sun rays affect the skin on our lips to a large extent. It is always nice to use some natural ingredients on the beautiful lips. You could use some butter fresh from warmed up milk and some sugar on the lips.
Sugar exfoliates the skin on the lips by taking the dry skin away. You can also use some lemon as a scrub on the lips. Next use some natural moisturizer.
This is a good way you can do up your lips to make them look plump and full. Use some eye shadow powder that is pink, light brown or natural. You can use some lip liner to paint the outline.
Follow the curve of the lips and then apply some eye shadow with a lipstick brush. You can then use some gloss to cover the lips. The lips would look plump and full undoubtedly.
Many of us aspire to have lips like Angelina Jolie’s but after a lip job many of us end up have lips like MJ’s. Lip jobs just don’t work for many. Either the lips get too full or too stretched.
It is best that we try top achieve the pout naturally. Full lips make your face appear sexier and vibrant. You need not paint your lips too red if you have full lips. You could paint them a pink shade or a brown to give them the soft and subdued natural look.
You can always go in for a permanent option of plumping your lips but natural options and achieving the plumpness through make up is also possible.
Flaunt your lips and full lips look best when they frame a smile within. Here is a tip. Look at the mirror and try to smile the best way so that your lips look healthy and attractive. Flash that smile and be confident.
India's Biggest Sale Amazon Great Indian Festival starting .Best Deals on Fashion Jewellery- Designerplanet


This can be prevented by the use of a proper lip balm when we go out in the sun. Sun rays affect the skin on our lips to a large extent. It is always nice to use some natural ingredients on the beautiful lips. You could use some butter fresh from warmed up milk and some sugar on the lips.
Sugar exfoliates the skin on the lips by taking the dry skin away. You can also use some lemon as a scrub on the lips. Next use some natural moisturizer.
This is a good way you can do up your lips to make them look plump and full. Use some eye shadow powder that is pink, light brown or natural. You can use some lip liner to paint the outline.
Follow the curve of the lips and then apply some eye shadow with a lipstick brush. You can then use some gloss to cover the lips. The lips would look plump and full undoubtedly.
Many of us aspire to have lips like Angelina Jolie’s but after a lip job many of us end up have lips like MJ’s. Lip jobs just don’t work for many. Either the lips get too full or too stretched.
Long Lasting Lip Color & Lip Makeup
It is best that we try top achieve the pout naturally. Full lips make your face appear sexier and vibrant. You need not paint your lips too red if you have full lips. You could paint them a pink shade or a brown to give them the soft and subdued natural look.
You can always go in for a permanent option of plumping your lips but natural options and achieving the plumpness through make up is also possible.
Flaunt your lips and full lips look best when they frame a smile within. Here is a tip. Look at the mirror and try to smile the best way so that your lips look healthy and attractive. Flash that smile and be confident.
LIPS - Lip Makeup and Lip Products
People also Read..
You may also be interested.
The Amazon Black Friday and Cyber Monday deals are here across Mobile laptops, TVs, speakers, and much more. Designerplanet
5 Beauty products you should Shop from Amazon’s Black Friday and Cyber Monday Sale .Designerplanet
German Oxidised Silver Afghani Navratri Garba Style Traditional Maang Tikka with Jhumka Earrings Jewellery Set for Women and Girls
Best Christmas Gifts for your Mom That'll Definitely Make Her Smile.Designerplanet
Christmas Santa Coxeer 16PCS Wine Bottle Hat | Christmas Santa Mini Hat Multi Purpose.Designerplanet
Christmas Tree Decoration Items Online.Designerplanet
Cake Baking Kit .. Upto 40% Off On Select Product.Designerplanet
Designer Planet: Christmas Dress for Children
Woolen kurtis For Women | Kurtis for winter: Woolen kurtis that will keep you warm & stylish - Designerplanet
Designer Woolen Shawl | Latest Winter Stole | Designer Winter Kurtis
Best Blanket Brands in India Best Blanket Brands in India . Designerplanet
Hair Styles to Suit your Face
 | 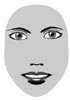 |  | 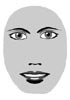 | 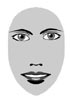 |
Heart Oval Round Square Triangular
Beautiful hair is the crowning glory of an attractive woman. So hair care is an extremely important aspect of beauty. But you should make sure that you have a style that suits your face and your hair type. Of course, it should be in fashion too. Although, sometimes the simplest of styles are the best.
Based on Type of Hair
Let us see which styles go well with your type of hair.
- Thin and fine: If your hair is thin and fine, keep it short and fluffy
- Medium or coarse: This hair can handle most styles
- Heavy or thick: If your hair is heavy or thick, keep it at a medium length or it will not hang well.
What is the shape of your face?
What is the shape of your face?.Designerplanet

In order to determine the shape of your face, you will need to measure it. Measure your face from top to bottom and from side to side. If your face is oval shaped, then the length will equal to one and a half times the width. When the length of your face equals the width, then you have a round face. Triangular shaped faces have wide chins and narrow foreheads. Lastly, square shaped faces have a jawline, cheekbone and forehead almost equal in width.
Heart-shaped face
In order to express your features, you must try to diminish the width of your forehead and make your jaw wider. If you want bangs, wear them full and curly. Wear your hair fuller at the top than near your jawline. Your hair should be either short or of medium length and point your hair towards your face, since this will help to widen your chin. If you love short cut bobs up to your chin, then you should definitely get one, since your heart-shaped face will make you look like you just walked out of a magazine.
Oval faces
Since, you are blessed with an oval face, mostly any hairstyle will look good on you. You can wear your hair short, medium or long. A wonderful hairstyle would be one in which you do a side or a center parting and let your hair rest on your shoulders. In addition, you may also wear your hair slicked back or pulled back. However, it is advisable to have your hair away from your face and not to have too full bangs. Your face shape is adaptable to almost any hairstyle and that is why you should experiment and see which one you like the best.
Round faces
If you have found out that you have a round face, remember either to have short hair or chin length hair. You should consider layering your hair right from the top and keep your hair close to your face. Do not cut your hair very, very short and have a haircut that is rounded and ends at your chin. This will exaggerate your face shape even more. Straight bangs are not recommended, but if you love bangs, you should curl them and wear them to the side. These types of hairstyles will make your face look longer, which is what you want to strive for. Do not keep a lot of hair near the sides of your face and near your ears. However, wispy curls curled towards your face is recommendable. The point of all these hairstyles is to make your face look longer and less rounder and to accentuate your beautiful features.
Square Face
A square face has a very sharp angled jawline and has square shaped eyebrows. In order to lessen these features, you should strive for hairstyles that emphasize the cheekbones. Hairstyles worn in curls and waves will give shape to your square face. The length of hair that is perfect for you is about 1-1/2 below the chin or to have shoulder length hair. Your hair at these lengths will help to alleviate the squareness of your jaw line. It is advisable not to let your hair hang and better to wear a side part than a center part. Any freeflowing hairstyle for this shape will look wonderful.
Triangular shaped face
Since you have a triangular shaped face, you want to narrow the chin and widen the forehead. Keep your hair away from your face and ear to widen your forehead. In addition, you should angle your hair towards the chin. You should keep your hair length at least up to your chin and cut your hair in lots of layers. Also if you let your hair loose tuck it behind your ears so that it will help to highlight your eyes and increase the width around this area. In addition, instead of parting your hair in the center, try parting it off-center and see the model look you have always loved!
..
..Heart-shaped face
In order to express your features, you must try to diminish the width of your forehead and make your jaw wider. If you want bangs, wear them full and curly. Wear your hair fuller at the top than near your jawline. Your hair should be either short or of medium length and point your hair towards your face, since this will help to widen your chin. If you love short cut bobs up to your chin, then you should definitely get one, since your heart-shaped face will make you look like you just walked out of a magazine.
Oval faces
Since, you are blessed with an oval face, mostly any hairstyle will look good on you. You can wear your hair short, medium or long. A wonderful hairstyle would be one in which you do a side or a center parting and let your hair rest on your shoulders. In addition, you may also wear your hair slicked back or pulled back. However, it is advisable to have your hair away from your face and not to have too full bangs. Your face shape is adaptable to almost any hairstyle and that is why you should experiment and see which one you like the best.
Round faces
If you have found out that you have a round face, remember either to have short hair or chin length hair. You should consider layering your hair right from the top and keep your hair close to your face. Do not cut your hair very, very short and have a haircut that is rounded and ends at your chin. This will exaggerate your face shape even more. Straight bangs are not recommended, but if you love bangs, you should curl them and wear them to the side. These types of hairstyles will make your face look longer, which is what you want to strive for. Do not keep a lot of hair near the sides of your face and near your ears. However, wispy curls curled towards your face is recommendable. The point of all these hairstyles is to make your face look longer and less rounder and to accentuate your beautiful features.
Square Face
A square face has a very sharp angled jawline and has square shaped eyebrows. In order to lessen these features, you should strive for hairstyles that emphasize the cheekbones. Hairstyles worn in curls and waves will give shape to your square face. The length of hair that is perfect for you is about 1-1/2 below the chin or to have shoulder length hair. Your hair at these lengths will help to alleviate the squareness of your jaw line. It is advisable not to let your hair hang and better to wear a side part than a center part. Any freeflowing hairstyle for this shape will look wonderful.
Triangular shaped face
Since you have a triangular shaped face, you want to narrow the chin and widen the forehead. Keep your hair away from your face and ear to widen your forehead. In addition, you should angle your hair towards the chin. You should keep your hair length at least up to your chin and cut your hair in lots of layers. Also if you let your hair loose tuck it behind your ears so that it will help to highlight your eyes and increase the width around this area. In addition, instead of parting your hair in the center, try parting it off-center and see the model look you have always loved!
....
07 October
How to Keep Your Nails Long and Strong

Healthy long and strong nails are the only way to beautiful looking hands and a gorgeous manicure. Chapped nails, discolored nails or weak, flexible nails have an unpleasant effect over the way they look. They look unaesthetic and need proper care ion order to revert to their natural healthy state.
Nails can become brittle due to lack of nutrients in our body or improper nail care. Problematic nails can also show signs of certain diseases like respiratory problems, bacteria development or other health problems.
In order to prevent or treat any nail problems you need to make sure you:
- eat healthy in order for the nails to get all the nutrients they need in order to grow, maintain their transparency and healthy shine
- take pills that are especially designed to promote healthy nail growth. They can be purchased from any drug store without prescription and they are very effective
- avoid injuring and biting your nails because your nails grow at a slow pace
trim your nails and care for them regularly in order to smooth out the edges of the nail and prevent them from breaking
- make sure you moisturize your nails to prevent them from becoming dull looking. Nails need moisturizer too, especially after using an acetone nail polish remover
- if your nails are soft and flexible apply a solution of vitamin B on them. This will make them stronger
- apply a nail hardener when you are trying to grow out your nail. Nail polishes that promote nail growth are very effective because they harden soft nails, preventing them from breaking easily
- try to use nail polish remover as rarely as possible because they damage the nail. Try to use a nail polish remover that is acetone free whenever you want to remove the nail polish off your nails

Take care of your nails because they too need maintenance and care like every other part of your body. This is the only way your nails will look their best, and your manicure will be well groomed and gorgeous.

Nail Manicure

Your nails need to be taken care of too. Giving your nails a manicure is a good way to take care of them and pamper them. Given below are the steps to achieve the perfect manicure at home.
- To begin with remove all traces of your nail polish. Use as many cotton balls as needed.
- Use a nail file or an emery board to shape your nails. File in one direction only. Do not use the seesaw motion. To shorten the nail, use the course side of the emery board first and finish with the finely textured side.
- Work on your nails carefully and with respect. Do not go overboard with your manicure.
- To check if your nails are well done run your nails over a pair of old pantyhose. Your nails should not snag the hose.
- Apply cuticle remover cream and gently push back the cuticles using a cotton bud. Never cut your cuticles. Massage away dead skin using circular movements.
- Apply hand lotion and massage your palm of your hand with the thumb of your other hand. This will improve blood circulation. Work your way all over your hand and repeat with your other hand.
- Before you paint your nails, clean them with an orange stick that has been wrapped with cotton and dipped in nail polish remover and rub over the surface of the nail. Remove any creamy residue, if there is none then you can polish your nails.
- While polishing your nails being in the center of your nail. Paint one stroke down the center and then the sides of the nail. You should paint a nail in three strokes. Let it dry completely before applying the second coat.
- Apply color after your nails are completely dry. Use a base coat before applying nail polish. Then apply a color of your choice and do not apply a new coat before the previous one dries. You should apply three coats of color. After applying color apply topcoat and it will give added protection and help your nail color to last longer without chipping.
- Store nail polish in the fridge. To prevent the cap from sticking apply a little vaseline around it.
How To Do Home Pedicure

simple pedicure steps that go into adding beauty to your feet.
Purpose of pedicure
-
To keep the feet in good condition and to make the skin soft and smooth.
-
It improves blood circulation, nourishes the skin and the leg and foot muscles
-
It discourages foot ailments.
Things NeededNail Cutter
Nail Filer
Nail Brush
Cuticle Cutter
Cuticle Pusher
Pumice Stone
Foot Scraper
Orange stick
Basins
Materials
Acetone
Bath salts
Epsom salts
Liquid soap
Hydrogen peroxide
Moisturizing lotion
Cuticle remove
Nail polish
Luke warm water
Home Pedicure
Remove existing nail polish with cotton dipped in acetone. Cotton band is better than cotton balls as they tend to stick to the nail
Soak your feet in luke-warm water with liquid soap and Hydrogen peroxide. You can also add Epsom salts or bath salts to the water. Soak for 10 minutes
Clean your feet with the nailbrush, foot scraper and pumice stone. The idea is to smoothen the skin.
Remove your feet from the basin
Cut your toenail straight across which helps prevent ingrown toenails
After cutting your toenails, file them to make the edges smooth
To the base of the skin, apply cuticle remove and rub in. Slowly push the skin back with an orange stick to the
place where it meets the skin
You can use a cuticle moisturizer if the cuticles do not push back.
Massage your feet with a moisturizing lotion
You can also use an exfoliating lotion if your skin is too dry
You can also massage your feet with a good cream.
Separate your toes with cotton in between them
Apply the first coat of nail polish and allow it to dry for some time
Clean up any stray polish on the toes and apply the second coat and allow it to dry.
Add a clear coat of polish once dried.
Your feet are now ready to add charm to your beauty.
New Year Skincare Coupon Code "happy15" Top Brands Great Service Save 15% Now
Winter Skin Care. Designerplanet

Winter Care For All Types of Skin
The Winter Season which brings us the joy of fireside reading, snuggling close to the pillows wrapped from head to toe with a comfy quilt also hampers our body and hair with the cold winds. Overexposure to dry, cold wind damages the skin. As a result, the unprotected cells become inflamed, causing a tingling sensation on the skin, a problem that is particularly common among the elderly in cold season. However, a little care will keep the wintry troubles at bay. Dry skin suffers more than oily skin. However, the following measures are helpful for all types of skin.
The Winter Season which brings us the joy of fireside reading, snuggling close to the pillows wrapped from head to toe with a comfy quilt also hampers our body and hair with the cold winds. Overexposure to dry, cold wind damages the skin. As a result, the unprotected cells become inflamed, causing a tingling sensation on the skin, a problem that is particularly common among the elderly in cold season. However, a little care will keep the wintry troubles at bay. Dry skin suffers more than oily skin. However, the following measures are helpful for all types of skin.
..
..Your skin texture depends not only on external treatments, but also on the intake. A proper nutritious intake helps in rejuvenating the skin from within. Water plays an important role in keeping your skin alive. A good amount of water helps in retaining the moisture of your skin as well keeping skin disorders at bay. Fruits and vegetables in your daily diet release a lot of water to your system. Primrose syrup and olive oil in your diet also aids in softening your skin.
Cold weather and cool winds aggravate dry skin condition; so adjust lifestyle and diet add warmth, lubrication, and moisture. Moisturizers and cold creams are a must in the winters Tone and moisture after each cleansing to preserve and replenish the moisture in your skin. Use a moisturizing night nourisher every evening. Apply a daytime moisturizer around your eyes and on dry-skin areas each morning.
Cold weather and cool winds aggravate dry skin condition; so adjust lifestyle and diet add warmth, lubrication, and moisture. Moisturizers and cold creams are a must in the winters Tone and moisture after each cleansing to preserve and replenish the moisture in your skin. Use a moisturizing night nourisher every evening. Apply a daytime moisturizer around your eyes and on dry-skin areas each morning.

Use the paste of ground green gram powder instead of soap to work your way to a soft and supple skin.
Pamper you skin with a little coconut oil before bath to heal dryness and chaps. Use a creamy soap that renders that extra suppleness to your skin.
Wait 30 minutes after bathing, or washing your face, before going out into frigid air. Splash your face with cool water when you come back inside. Extreme temperature changes can burst capillaries near the skin's surface.
Add a few drops of oil to the water that you are using to bath. This will help retain the moisture lost when bathing. Avoid using very hot water during winter as it can decrease the natural oils of your skin. Instead shorten your bath time
Although it doesn't taste very great flaxseed oil can moisturize your body from the inside. Since it is rich in vital fatty acids it can do a lot for your overall health. It is available in oil form as well as in capsule form.
The pre-bath warm oil self-massage, called abhyanga, is a must-do in winter. The massage not only keeps your skin silky smooth, it also tones the muscles, calms the nerves and aids circulation. Pat excess oil off with a paper towel before you step into the bath or shower. Use a nourishing oil such as almond or sesame oil for the massage.
Related Articles >>>
OZiva Plant Based Biotin | OZiva Protein & Herbs for Men and Women - Designerplanet
Dove Deep Moisturisation Cream Review - Designerplanet
Minimalist Skin Care Product Review - Designerplanet
Designer Planet: Shahnaz Husain Shatone Herbal Scalp Tonic
Baby Skin Care Products.Designerplanet
Designer Planet: Skin Care Product
Designer Planet: Skin and Personal Care
Designer Planet:Amazing Tips to Get Fair Skin
Designer Planet:Look Glamorous Without Makeup
Cheap & Best Professional Skincare & Facial Products
The Benefits Of Using Aloe Vera For Skin Care And More ...
Nourish you skin by adding a few drops of jojoba oil or sweet almond oil into your every day bath. It will do wonders for your skin.
Give your skin lipid support from within by including soaked and blanched almonds, soaked walnuts, whole milk, fresh cheese, and ghee (clarified butter) in your diet. Drink a cup of warm milk laced with 1/4 teaspoon ghee at bedtime for a daily boost of lipid support.
The Amla fruit (Indian Gooseberry) is the richest known natural source of vitamin C. Herbs such as Amla provide concentrated nourishment to the deeper layers of the skin. Take Amla, also known as Amalaki, on a regular basis to replenish skin from within.
Zucchini and other summer squashes, tender asparagus, tender greens, and carrots make excellent vegetable choices. Sweet juicy berries, cooked apples and sweet grapes are good fruit choices. Drink lots of warm water through the day.
Do not use harsh soaps to cleanse, as they will strip your skin of precious lipids. Use a non-soap cleanser or very mild soap to cleanse.
Before Going Outside in Winter
When the cold and pressure are extreme, the dead cells on the epidermis desquamate-they burst-leaving the living, young cells of the dermis layer exposed prematurely to the elements. As a result, the unprotected cells become inflamed, causing a tingling sensation on the skin. However, a little care before you step out of your place will keep the wintry troubles at bay.
Apply a heavy layer of moisturizing broad-spectrum sunscreen with an SPF of 15 or higher to the face, hands, and any other skin that may be exposed. This will act as a barrier to help protect against the harsh elements and is especially important if you will be outside for any length of time. Sunscreen is important in winter as the sun's reflective powers are great year round - 17% on the sand and 80% on the snow. Today, several products are available that combine oily, moisturizing cream with sunscreen. If you are unsure of which product to use, ask a dermatologist.
Put gloves as it protects hands from the cold air and low humidity and avoid flare- ups. Make sure the gloves are made from material that does not irritate your skin. Some patients find that wearing a cotton mitten next to the skin and a woolen mitten over the cotton one, keeps hands warm and dry.
The most common triggers of the scratch/itch cycle are sweating and overheating. Wearing layers allows you to remove clothing as needed to prevent overheating. Be sure to wear loose-fitting cotton fabrics next to your skin.
Shed wet clothes and shoes immediately. These can irritate the skin and cause a flare-up.
Best Nail Care Tips .Designerplanet

The colour of the nails are indicators of good health or sickness.
Healthy nails are transparent and look a little rosy because of the blood underneath.
Remove all nail polish every week and allow nails to breathe.
Give a shine to the nails by massaging coconut oil or warm castor oil on them
If you don't care for nail polish, apply dry soap to your nail and buff or you can use lemon peel with the san result.
Dip a cotton-tipped swab in hydrogen-peroxide or. clean under the nails, to whiten them.
Before a manicure dip your nails in a cup of warm water with one tablespoon of lemon juice added to it.
Insert your fingertips in half a lemon and twist yot fingers back and front to clean the cuticles and nails.
Before applying nail varnish, apply a base coat three smooth strokes. Apply from the nail bed to the nail @ip. Allow to dry before giving a second coat an then a third coat.

More Deal >>>>
India's Biggest Sale Amazon Great Indian Festival starting October .Best Deals on Fashion Jewellery- Designerplanet

Tips On Nail Care
Nail Care is important when it comes to personal grooming. Suppose a woman has applied makeup carefully and attired herself with most fashionable clothes, but has been careless about her nails. How do you think she would look like then? Won't it be a bit shabby? It happens in our everyday life. Indeed it would be better if we give some more attention to nail care. Here are some essential tips on nail care which would definitely help you a lot.
Nail Care
Nail Care
- Take care of your nails between salon visits.
- File your nails regularly and always keep them short.
- If your nails are exposed to chemicals, moisture, water, etc, it could result in split peeling nails or allergic reaction. Wear rubber gloves to protect your nails or coat them with some cotton.
- Never use something like scissors for both for infected and non infected nails.
- Always get artifical nails applied by a good technician.
- Artificial nails would need manicure or refilling every two or three weeks.
- If you decide to remove them, appropriate solution is not difficult. Even when the artificial nails are removed, natural nails remain in the same condition.
Nail Tip Design
- Using glue could damage your nails, even if it is applied on polish layers.
- Ensure the last polish layer is dry before applying the next. Use layers of different colours.
- Keep on experimenting with nail tip design. You could use Chinese characters, apply small fake tattoos or create different patterns.
- You could use band-aids for applying design. Cut band-aids and stick them on top of a dry coat of polish. Contrasting color would look good.
..
..More Deal >>>>
The Amazon Black Friday and Cyber Monday deals are here across Mobile laptops, TVs, speakers, and much more. Designerplanet
5 Beauty products you should Shop from Amazon’s Black Friday and Cyber Monday Sale .Designerplanet
German Oxidised Silver Afghani Navratri Garba Style Traditional Maang Tikka with Jhumka Earrings Jewellery Set for Women and Girls
..
..
For Acryllic Nails
- Keep your acrylic nail polished. Thick polish could cause bubbles and uneven application. So first add a drop of polish and then dilute it thinner.
- Before applying any acrylic layer, clean your nails. If the nails have remnants of cuticle oil, old polish or lotion, the new polish would not apply itself properly.
- For avoiding bubbles, remove the excess from the brush along the bottle's border.
- Lay a base coat to protect your nails and in the process, help helps the acrylic layer to stick in proper way.
- Use a nail stick to clean up the acrylic on the skin around the fingernail.
- Seal the polish with a top coat to camouflage possible bubbles or streaks.
- Seal the polish with a top coat to camouflage possible streaks or bubbles. It also adds shine.
- Allow enough time to the nails to dry.
- Nail Care product
Subscribe to:
Posts (Atom)


